If you post daily vlogs, you understand the amount of effort that goes into creating each one. One component that consumes time is voiceover recording. You have to re-record lines or correct minor errors.
This interrupts your flow and breaks your creative pace. That’s when AI voiceovers step in. They assist you in conserving time and yet maintaining your videos clear and crisp.
With the voice generator of CapCut PC, you can convert written text to voice with just a few clicks. You don’t require a mic or a silent area. It is quick, easy, and natural-sounding. Here you will learn how to make voiceovers using CapCut Desktop Video Editor for your vlogs with ease and with higher quality.

Why Use AI Voiceovers in Daily Vlogs?
When producing vlogs daily, you would want your videos to be clear and clean. But camera talk is a process. You may stutter, shift tone, or need to re-record. With an AI voiceover, you can maintain your message steady and clear throughout.
With the voice tool in the CapCut Desktop Video Editor, you don’t have to speak a word. Simply key in your words, choose a voice, and the tool reads it for you. This saves you time and allows you to work faster through editing.
You also receive lots of voice styles. You can pick a peaceful voice for a narrative, or a cheerful voice for a playful vlog. Some voices talk in different languages. It makes your audience bigger and enables you to reach out to new viewers.
If you’re vlogging in a busy area or don’t have a microphone, this tool is fantastic. No sound setup or quiet room is necessary to make your video sound good. Most vloggers nowadays rely on an AI voice generator to maintain their work quickly and seamlessly.
Although CapCut PC provides numerous tools at no cost, certain voice genres and premium options might require payment.
CapCut PC’s AI Voice Narrator for Vlogs
It is easy to convert your script to voice using CapCut Desktop Video Editor. You simply type your statement, select a voice, and the software speaks it out. It sounds clear and lifelike, as if someone is speaking. This makes your vlogs feel more natural, even without a microphone.
You can pick from many voice styles: calm, clear, fun, or serious. Each one fits a different mood. There are voices in many languages, too. This helps you make content for people who speak different languages or want to hear a new tone.
To access it, you’ll have to download CapCut PC from the official website. Once you’ve installed it, you can try out free and paid voices. Begin with the free voices and hear how they sound. If you need additional ones, there are additional styles which you can unlock.
The software is suitable for every type of vlog, whether it is a daily update or a travel tale. And if you want your video to look neat as well, then you can use an AI video upscaler to get better-quality footage. Strong visuals and sleek voiceovers combined can make your content reach the next level.
When Should You Use AI Voiceovers in Daily Vlogs
There are lots of situations where an AI voiceover naturally fits within your vlog. You can use it for a nighttime story or for a speed bump recap. It’s perfect for product reviews or tutorials where clarity of steps is important. You can use it to narrate travel footage or B-roll, too.
If you are outside or in a noisy location, you might not end up with clean audio. That is where resources such as text to speech AI come in. Simply write your lines and insert the voice afterwards using CapCut PC.
Regardless of your approach, AI voiceovers make your vlogs sound clear and silky-smooth—even if the environment is less than ideal.
How to Add AI Voiceovers in CapCut Desktop Video Editor
Step 1: Download and Install CapCut PC
Visit the official CapCut website. Download the installation package for CapCut Desktop Video Editor. Run it and follow the installation steps. Then, log in or create a new account to begin editing.

Step 2: Import Your Vlog Footage
Open CapCut PC. Click the “Import” button in the top left corner. Choose your video file from your device and add it to the timeline.
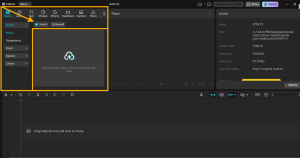
Step 3: Use the Text-to-Speech Tool
Click on the “Text” tab in the left panel. Enter your script into the text box. Next, click the “Text to speech” button. A panel will open with voice choices. Select your voice, language, and tone. You can also adjust speed and pitch with easy sliders.
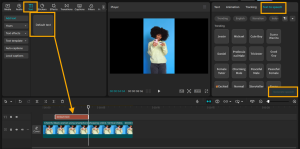
Step 4: Align Voiceover with Video
Drag the voiceover from the audio layer into the timeline. Sync it with your video clips to maintain the proper timing.
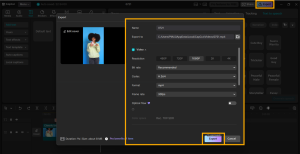
Step 5: Export and Share
Press the “Export” button in the top right corner. Select your video quality and type. Finally, save your vlog with the voiceover included.
Conclusion
If you desire to create improved vlogs without investing hours into voice work, AI voiceovers can assist. Through CapCut PC, you will be able to provide clean and clear voice narration for your videos within a few simple steps.
There is no need for voice talent or sound equipment to make it successful. Some voices might require additional charges, but the utility provides you with powerful results even using the free voices.
Go to the official CapCut website to download CapCut Desktop Video Editor. Test the voice generator in your next vlog, and listen to yourself.